Tutorial:a camouflage-patterned fabric tote bag(DIY mini tote bag)
Today’s handmade work is a “DIY camouflage-patterned fabric tote bag (with flat bottom and lined)". It is a simple tote bag without zipper and pockets.
The finished size is about 15cm x 24cm, with a gusset length of about 8cm, which is rather small for a tote bag. I think it is just right for a “lunch tote bag" where you can carry your lunch and drinks.
It might be a little bit difficult to put on a handle, but you can finish it if you make it carefully by following the instructions step by step.
Materials
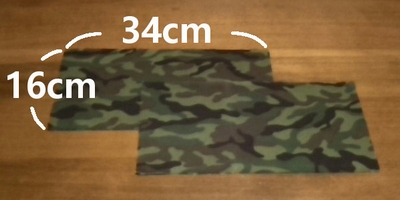
Outer fabrics are 2 pieces of 16cm x 34cm sized fabric. (Seam allowances are included. Attach fusible interfacing on the back.)
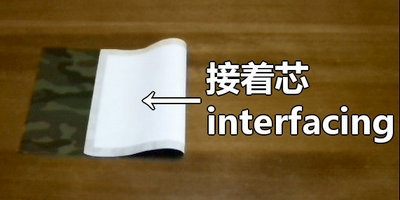
Fusible interfacing gives fabric firmness and keeps the shape of the tote bag.
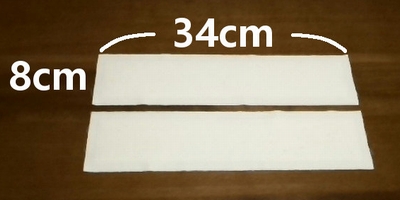
Bottom patch fabrics are 2 pieces of 8cm x 34cm sized fabric. (Seam allowances are included. Attach fusible interfacing on the back.)
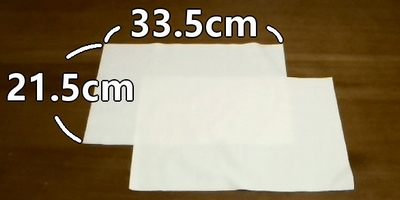
Lining fabrics are 2 pieces of 21.5cm x 33.5cm sized fabric. (Seam allowances are included)
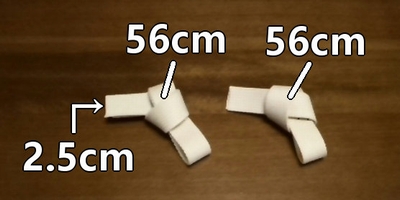
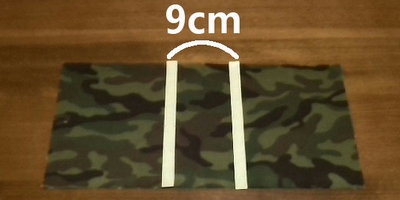
Handles are 2 pieces of 2.5cm x 56cm. Handles can be made by using any fabrics of your choice. Acrylic webbing tape is recommended from craft shop. (It is easy to make.)
How to make the outer fabrics of the tote bag
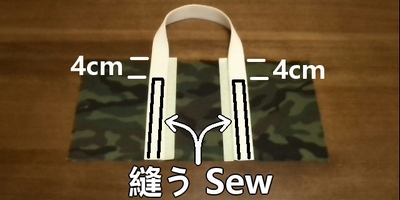
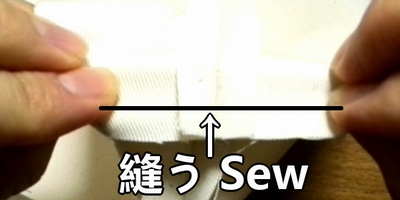
1. Attach a masking tapes on the outer fabric. (Since the tape is peeled off after sewing the handle, use a weak adhesive type of tape. Strong adhesiveness can damage the fabric.)
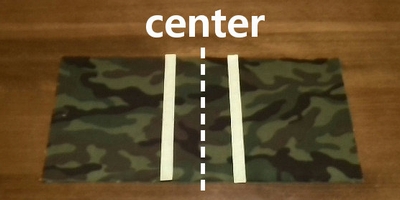
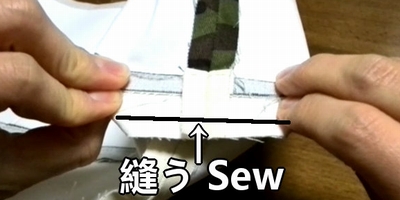
2. Place the handle on the edge of masking tape. Then sew.
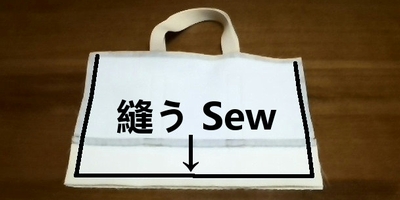
3. Sew the outer fabric and bottom patch with right side together. (When sewing right sides together, the front side of each fabric is placed facing each other.)
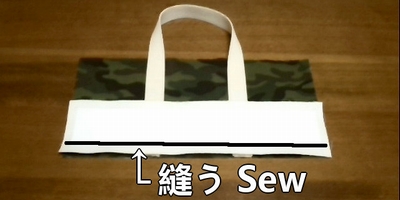
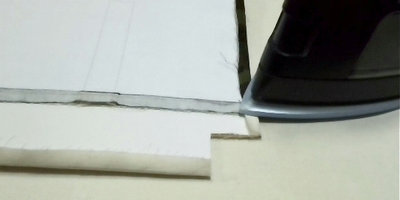
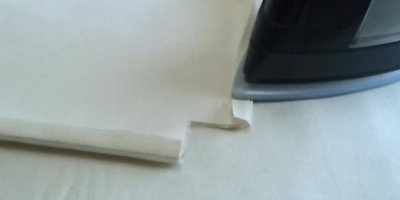
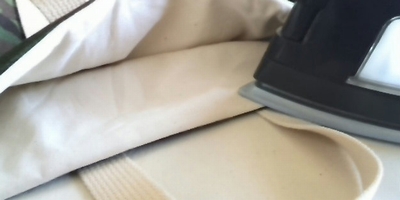
4. Fold the bottom patch, and iron. Then stitch at the edge.

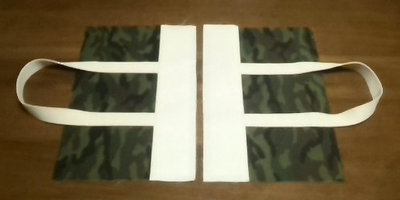
5. The remaining fabric should be sewn in the same way.
How to sew the bag body (outer bag)
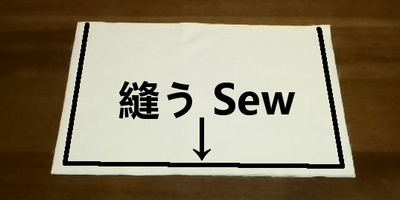
1. Place the outer fabrics with right side, and sew the side and bottom.
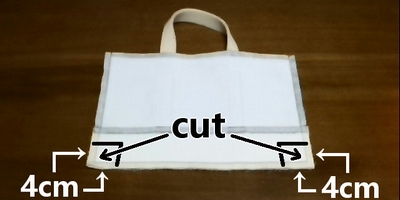
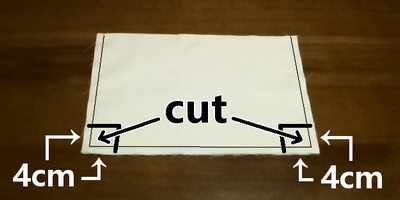
2. Cut off extra corner cloth and press seam allowances open. Then make gusset and sew. (Gusset adds depth to the bag.)
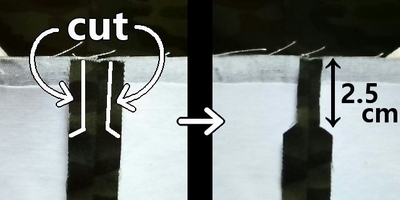
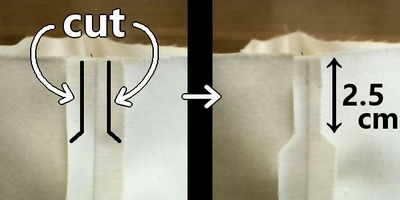
3. Cut the extra seam allowances (2.5cm from bag opening).
How to make the bag body (lining bag)
1. Place the lining fabrics with right side, and sew the side and bottom.
2. Cut off extra corner cloths, and press seam allowances open. Then make gusset, and sew.
3. Cut the extra seam allowances (2.5cm from bag opening).
How to sew the tote bag (finishing the bag)
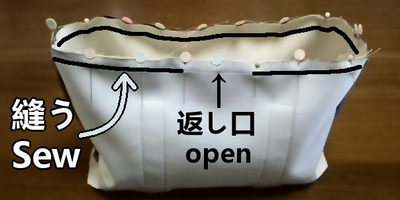
1. Insert the lining bag into the outer bag with right side together. Then sew around perimeter of bag opening. (Leave 7cm gap for turning.)
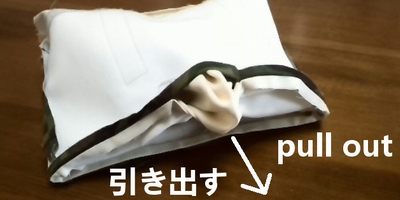
2. Press seam allowances open, and turn inside out from the gap.

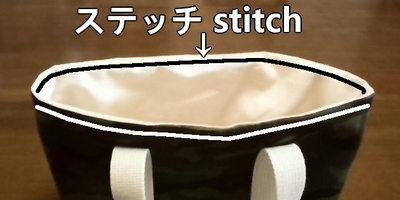
3. Iron and stitch the edge of bag opening. The fabrics overlap and become thick in the bag opening, so be careful to sew the bag opening.
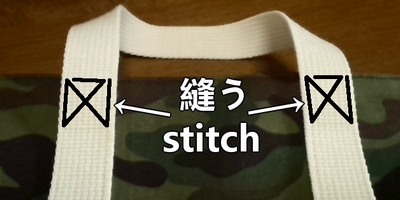
4. Reinforce the base of handles with stitch. Then iron to finish. The camouflage-patterned fabric tote bag is done.

Following is the video for how-to.