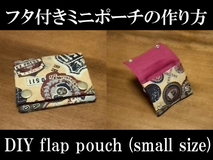
How to sew the flap pouch (small size)
Today’s handcrafted goods is “small flap pouch".
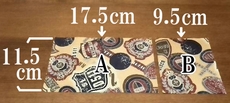
Materials
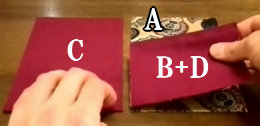
Outer body fabrics, “A" (11.5cm by 17.5cm) is 1 piece. “B" (11.5cm by 9.5cm) is 1 piece. (Seam allowances are included, attach interfacing)
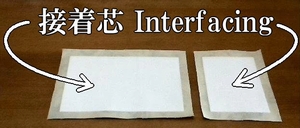
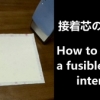
Fusible interfacing gives fabric firmness, and keeps shape of pouch.
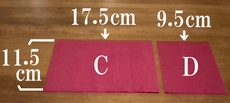
Inner body fabrics, “C" (11.5cm by 17.5cm) is 1 piece. “D" (11.5cm by 9.5cm) is 1 piece. (Seam allowances are included)
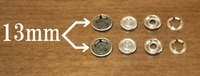
Snap fasteners (13mm diameter) are two pairs.
Flap pouch tutorial
1. Lay the “B" and “D" with right side, and sew the top. Then press seam allowances open.
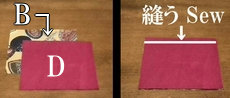
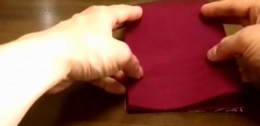
2. Turn inside out, and stitch the edge.
3. Lay the “A" and “(B+D)" with right side. Then lay the “C".
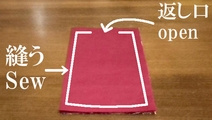
4. Sew around. (Leaving 6cm open for turning.)
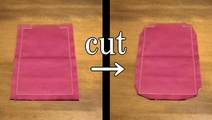
5. Cut off extra cloth, and press seam allowances open. Then turn inside out.
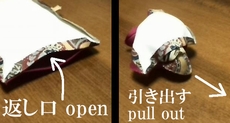
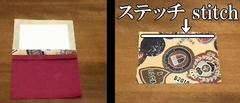
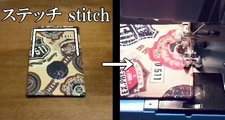
6. Do the ironing, and stitch the edge.
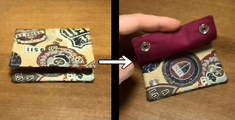
7. Install the snap fasteners in pouch. It’s done.
Making movie is the following.